Diy Headlight Replacement: A Step-By-Step Guide
Replacing your headlights is a simple DIY task that can improve visibility and safety. Follow these steps to easily replace your headlights and ensure optimal performance.
If you’re looking to replace your car’s headlights on your own, you’ve come to the right place. Properly functioning headlights are crucial for safe driving, especially at night or in low visibility conditions. By following this step-by-step guide, you can save money on professional installation and gain the satisfaction of knowing you did it yourself.
With just a few tools and this guide, you’ll have your new headlights installed and ready to light up the road in no time.
Credit: www.aarp.org
Importance Of Headlight Maintenance
Proper headlight maintenance is crucial for ensuring optimal visibility and enhancing the safety of your vehicle. By taking the necessary steps to maintain your headlights, you can greatly improve your ability to see and be seen on the road, reducing the risk of accidents and ensuring a safer driving experience.
Ensuring Proper Visibility
Poor visibility on the road can lead to hazardous driving conditions, especially during night-time or inclement weather. Regular headlight maintenance is essential to ensure that your headlights are working at their best and providing adequate illumination.
- Regularly clean your headlights to remove dirt, debris, and film buildup that can obstruct the light output. This will help maximize the brightness and effectiveness of your headlights.
- Inspect your headlights for any signs of damage or discoloration. Cracks, chips, or faded lenses can reduce the light projection and should be replaced immediately.
- Adjust the aim of your headlights to ensure they are properly aligned and directed towards the road. Misaligned headlights can lead to reduced visibility or glare for oncoming drivers.
Enhancing Vehicle Safety
Headlight maintenance is not only important for your own visibility but for the safety of other drivers on the road as well. Properly functioning headlights contribute to a safer driving experience for everyone by increasing the visibility of your vehicle and making you more noticeable.
- Regularly check that all your bulbs are working and replace any burnt-out or dim bulbs promptly. This will prevent situations where you are driving with only one functioning headlight, which can create confusion and potential accidents.
- Test your high beams and low beams to ensure they are working correctly. High beams provide additional visibility on dark roads, while low beams are essential for driving in traffic without blinding other drivers.
Maintaining your headlights is a simple and inexpensive way to prioritize your safety and that of others on the road. By following these steps regularly, you can ensure that your headlights are in top condition, providing optimal visibility and enhancing overall vehicle safety. Take the time to care for your headlights, and you’ll enjoy a safer and more confident driving experience.

Credit: www.amazon.com
Common Signs For Headlight Replacement
The condition of your car’s headlights is crucial for maintaining visibility and safety while driving at night or in poor weather conditions. Recognizing the signs that your headlights need replacement is essential to ensure you are not left in the dark. Dim headlights and flickering lights are common indicators that it’s time to replace your headlights. Addressing these issues promptly will help you maintain optimal visibility and, ultimately, ensure your safety on the road.
Dim Headlights
Dim headlights can significantly reduce your visibility, especially during nighttime or in low-light situations. Dim headlights often occur due to aging bulbs or a buildup of dirt and debris on the headlight lens. Regularly inspect your headlights for dimness, and if you notice a decrease in brightness, it’s likely time for a replacement. New headlights can ensure optimal illumination, enhancing your safety while driving in challenging conditions.
Flickering Lights
Flickering lights are another common indication that your headlights need replacement. Unstable electrical connections or a faulty bulb can cause lights to flicker, which can be distracting and reduce your visibility on the road. If you notice your headlights flickering, it’s important to address the issue promptly to prevent potential safety hazards. Replacing your headlights can resolve the problem and restore consistent, reliable illumination.
Tools Required For Replacement
Before starting the DIY headlight replacement, it’s crucial to have the necessary tools for a smooth process. With the right tools at hand, you can efficiently complete the replacement without any hassle.
Screwdriver Set
A screwdriver set is essential for removing the screws that secure the headlight assembly in place. It’s important to have a variety of screwdrivers on hand to ensure that you have the right size and type for the specific screws in your vehicle.
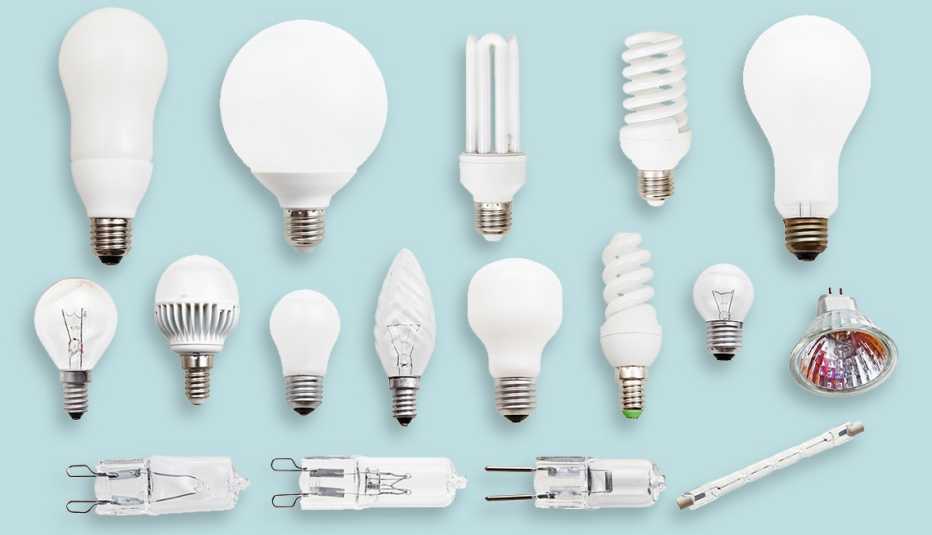
New Headlight Bulbs
Of course, you’ll need new headlight bulbs as replacements. Make sure to purchase the correct type of bulbs for your vehicle’s make and model. It’s advisable to check your vehicle’s manual or consult with an expert at an auto parts store to ensure you get the right bulbs.
Step-by-step Replacement Process
Replacing a headlight bulb on your own can save you time and money. Plus, it’s a simple task that anyone can do with the right tools and instructions. In this step-by-step guide, we’ll walk you through the process of DIY headlight replacement, ensuring you have a clear understanding of each step involved and how to carry them out successfully.
Preparing The Vehicle
Before you begin the replacement process, it’s important to prepare your vehicle properly. Follow these steps:
- Turn off the engine and locate the headlights. Most vehicles have a compartment at the front of the car that contains the headlight bulbs.
- If necessary, remove any obstacles or components that may obstruct your access to the headlight bulb compartment.
- Wear protective gloves to prevent any oil or dirt from contaminating the new bulb.
- If your vehicle has a manual to guide you through the process, consult it for specific instructions tailored to your vehicle’s make and model.
- Ensure that you have the correct replacement bulb for your vehicle. Refer to your vehicle’s manual or consult with a professional if you’re uncertain about which bulb to purchase.
Replacing The Headlight Bulb
Once you’ve prepared your vehicle, you can proceed with replacing the headlight bulb. Follow these simple steps:
- Locate the connector at the back of the headlight bulb and disconnect it carefully. To do this, gently press the clip or lever and pull the connector away.
- Remove any retaining clips or screws that secure the headlight bulb in place.
- Gently remove the old bulb by firmly gripping the base and pulling it straight out. Avoid touching the glass part of the bulb, as the oils from your skin can cause it to malfunction.
- Insert the new bulb into the socket, making sure it fits snugly. Give it a slight twist to secure it in place.
- Reattach any retaining clips or screws that were removed earlier to secure the new bulb.
- Reconnect the electrical connector to the back of the new bulb until you hear a click, indicating it’s properly connected.
- Turn on the headlights to test the new bulb. If it’s functioning correctly, you’re all set!
Remember to repeat the same process for the other headlight bulb if necessary.
Tips For Maintenance And Longevity
Regularly Check Headlights
Inspect headlights for any signs of damage or dimness.
Replace bulbs promptly if they are not functioning.
Clean Headlight Lenses
Use a mild soap and water solution to clean lenses.
Avoid abrasive cleaners to prevent scratches.

Credit: www.freepik.com
Frequently Asked Questions On Diy Headlight Replacement: A Step-by-step Guide
Can I Replace My Own Headlight Assembly?
Yes, you can replace your own headlight assembly. Just follow step-by-step instructions in your car’s manual for a hassle-free replacement process.
Can I Replace A Headlight By Myself?
Yes, you can replace a headlight by yourself. Just follow the instructions in your vehicle’s manual and ensure you have the correct replacement bulb. Park your car, open the hood, disconnect the bulb’s electrical connector, remove the old bulb, insert the new bulb, reconnect the electrical connector, and close the hood.
Do You Need To Disconnect Battery To Change Headlight?
No, it is not necessary to disconnect the battery when changing a headlight. Simply follow the vehicle’s user manual for instructions.
How Do You Change Headlights Step By Step?
To change headlights, park the car and turn off the engine. Open the hood and locate the back of the headlight assembly. Carefully remove the old bulb and replace it with the new one. Make sure it’s secure and test the lights before closing the hood.
Conclusion
Replacing your car’s headlights doesn’t have to be a daunting task. By following this step-by-step guide, you can easily replace your headlights on your own, saving both time and money. Remember to choose the correct headlights for your specific vehicle model and follow safety precautions throughout the process.
With the right tools and a little patience, you’ll have your new headlights installed in no time. Happy DIY-ing!