How to Master the Art of Cleaning & Maintaining an Oil Drain Pan: Foolproof Tips!
To master the art of cleaning and maintaining an oil drain pan, follow these foolproof tips: Ensure the pan is cool before cleaning by letting it sit for a few hours, then wear gloves to protect your hands. Clean off any excess oil with a disposable rag or paper towel, then use a degreaser and scrub brush to remove any remaining residue.
Rinse the pan thoroughly with hot water and dry it completely before storing it. Proper cleaning and maintenance of your oil drain pan will ensure its longevity and effectiveness in future use.
Why Proper Maintenance Is Essential For Oil Drain Pans
Properly maintaining your oil drain pan is crucial to ensure its longevity and effectiveness. With foolproof cleaning and maintenance tips, you can master the art of keeping your oil drain pan in optimum condition, guaranteeing smooth and hassle-free oil changes.
Oil drain pans are an integral part of any maintenance routine for vehicles or machinery that require oil changes. These pans allow for the efficient collection and disposal of used oil, preventing it from contaminating the environment. However, simply using an oil drain pan is not enough.
Regular and proper maintenance is essential to ensure its longevity, prevent contamination and cross-contamination, and ensure safe and efficient oil changes.
Extending The Lifespan Of Your Oil Drain Pan
Proper maintenance of your oil drain pan is crucial in extending its lifespan. Here are some key tips to help you keep your oil drain pan in top condition:
- Regularly clean the oil drain pan: After each use, make sure to thoroughly clean the pan using a degreaser and warm water. This will help remove any residual oil and prevent buildup that can lead to corrosion.
- Inspect for damages: Regularly inspect the oil drain pan for any signs of cracks, leaks, or other damages. If you notice any issues, it’s important to address them immediately to prevent further damage.
- Store in a dry place: When not in use, store your oil drain pan in a dry and cool place. This will help prevent moisture buildup and reduce the risk of rusting.
- Avoid harsh chemicals: Avoid using harsh chemicals or cleaning agents that can damage the material of your oil drain pan. Stick to mild detergents or degreasers specifically recommended for automotive cleaning.
Preventing Contamination And Cross-Contamination
Proper maintenance of your oil drain pan goes hand in hand with preventing contamination and cross-contamination. Here are some tips to keep your oil clean and prevent any unwanted contamination:
- Use a dedicated oil drain pan: It’s important to use a separate oil drain pan for each type of oil to prevent cross-contamination. Using one pan for multiple oils can lead to oil mixtures that may not be suitable for your specific machinery or vehicle.
- Clean before and after each use: Before using your oil drain pan, ensure it is clean and free from any contaminants. After each use, thoroughly clean the pan to remove any oil residues that can contaminate future oil changes.
- Avoid spills and splashes: When performing oil changes, be careful to prevent spills and splashes outside the oil drain pan. This will help prevent any accidental contamination that may occur if oil comes into contact with surrounding surfaces.
Ensuring Safe And Efficient Oil Changes
Proper maintenance of your oil drain pan is essential to ensure safe and efficient oil changes. Here are some tips to make your oil changes a breeze:
- Position the oil drain pan correctly: Ensure that the oil drain pan is positioned directly below the drain plug of the vehicle or machinery. This will help prevent oil spills and make the collection process more efficient.
- Use a funnel: When pouring oil into the drain pan, use a funnel to minimize spills and ensure accurate pouring. This will help prevent oil wastage and avoid unnecessary mess.
- Dispose of used oil properly: After collecting the used oil in the drain pan, make sure to dispose of it properly. Take it to a designated recycling center or follow local regulations for oil disposal. Improper disposal can harm the environment and result in hefty fines.
By following these tips, you can master the art of cleaning and maintaining your oil drain pan. Remember, proper maintenance is essential for extending its lifespan, preventing contamination and cross-contamination, and ensuring safe and efficient oil changes. Keep your oil drain pan in top condition and enjoy hassle-free maintenance for years to come.
Understanding The Different Types Of Oil Drain Pans
Mastering the art of cleaning and maintaining an oil drain pan requires understanding the different types available. Gain foolproof tips for effective maintenance in this informative guide.
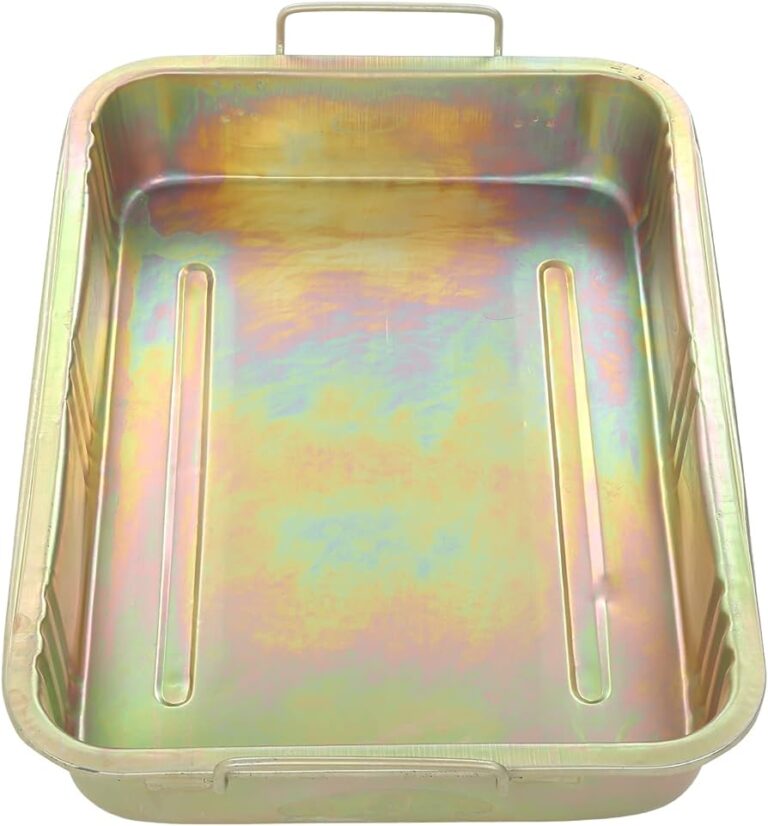
Steel Oil Drain Pans:
- Steel oil drain pans are incredibly durable and can withstand heavy use without any risk of cracking or leaking.
- These pans are suitable for handling hot oil and are resistant to corrosion.
- They often come with built-in handles and pouring spouts, making it easy to empty the oil.
- Steel oil drain pans are a great choice for professional mechanics or those who frequently change their own oil.
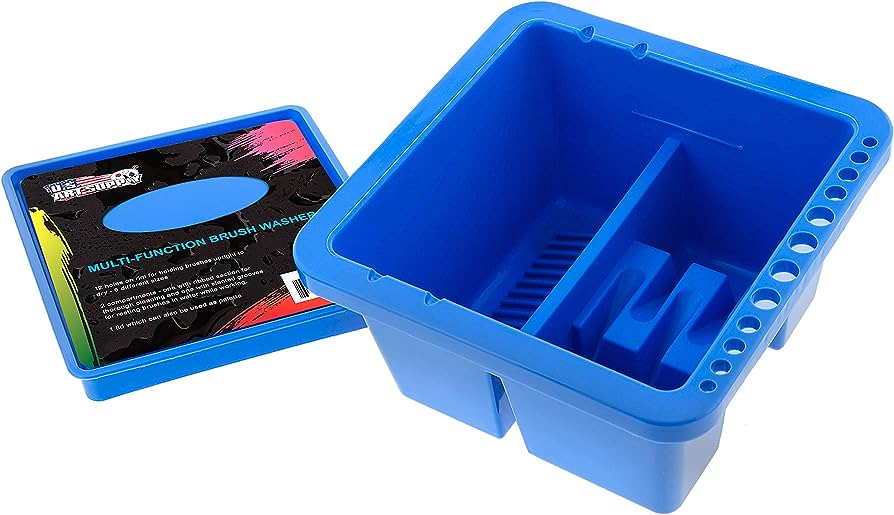
Plastic Oil Drain Pans:
- Plastic oil drain pans are lightweight and easier to handle compared to steel pans.
- They are affordable and widely available, making them a popular choice for DIYers.
- Plastic pans are generally resistant to chemicals, making them suitable for a variety of automotive fluids.
- However, they may not withstand extreme temperatures and can be prone to cracking over time.
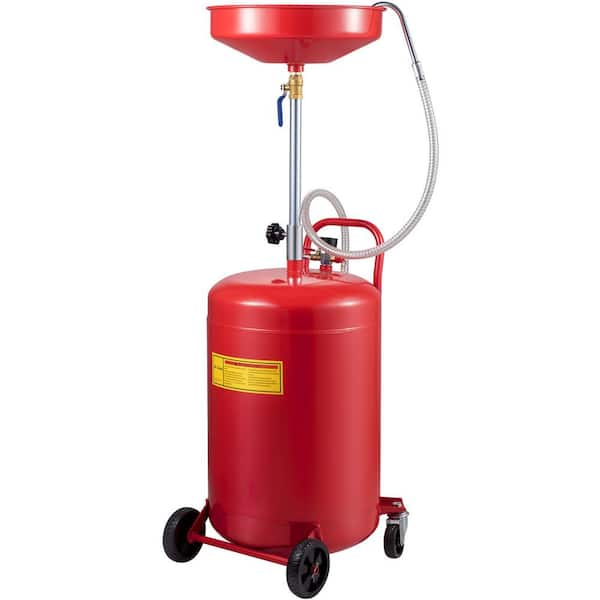
Portable Oil Drain Pans:
- Portable oil drain pans are designed with mobility in mind.
- They often come equipped with wheels and handles, allowing for easy transportation from one location to another.
- This feature is especially handy for larger vehicles that require oil changes in different areas.
- Portable oil drain pans are available in various materials, such as steel or plastic, to suit different needs.
Capacity and Size Considerations:
- When selecting an oil drain pan, it’s important to consider the capacity and size that fits your requirements.
- The capacity of the pan refers to the amount of oil it can hold. Choose a pan with a capacity that matches or exceeds the amount of oil your vehicle’s engine holds.
- Size is also an important consideration, as you want a pan that can easily fit under your vehicle.
- Ensure the pan has sufficient depth to prevent any spills or leaks during the oil change process.
Understanding the different types of oil drain pans is crucial for effective cleaning and maintenance. Steel oil drain pans offer durability and resistance to corrosion, while plastic pans provide affordability and chemical resistance. Portable oil drain pans are designed for easy mobility.
When choosing a pan, consider the capacity and size that best fits your needs. By selecting the right oil drain pan, you can ensure a smooth and hassle-free oil change experience.
Tools And Materials Needed For Cleaning An Oil Drain Pan
Mastering the art of cleaning and maintaining an oil drain pan requires the right tools and materials. Ensure you have items such as degreaser, scrub brush, and gloves to effectively clean the pan and keep it in optimal condition.
Cleaning and maintaining an oil drain pan is essential to ensure its longevity and efficiency in capturing and storing oil properly. To effectively clean an oil drain pan, you will need a few tools and materials. Let’s take a look at what they are:
Degreasing Agent/Cleaner:
- Choose a suitable degreasing agent or cleaner specifically designed to break down and remove stubborn oil residues. Opt for a product that is safe for the material of your oil drain pan.
- Apply the degreasing agent or cleaner generously onto the surface of the drain pan, focusing on areas with excessive oil buildup.
- Allow the degreaser to sit on the pan for a few minutes to penetrate the oil, loosening its grip.
- Use a scrub brush to agitate the surface of the drain pan and aid in breaking down the oil residues.
Scrub Brush:
- Opt for a sturdy scrub brush with stiff bristles to effectively scrub away oil residues from the surface of the drain pan.
- Make sure the brush is large enough to cover a substantial area at once, making the cleaning process more efficient.
- Use the scrub brush in conjunction with the degreasing agent or cleaner to scrub the pan’s surface thoroughly, targeting areas with stubborn oil buildup.
- For hard-to-reach spots or corners, consider using smaller brushes or even an old toothbrush.
Disposable Gloves:
- Wear disposable gloves before starting the cleaning process to protect your hands from contact with dirty oil residues.
- Disposable gloves create a barrier between your skin and the potentially harmful substances present in used oil.
- Ensure the gloves fit snugly and securely to provide maximum protection while allowing for dexterity during the cleaning process.
Safety Goggles:
- Protect your eyes by wearing safety goggles while cleaning an oil drain pan.
- Safety goggles shield your eyes from splashes of oil, degreasers, or any other cleaning agents that might be used.
- It is crucial to safeguard your eyes from potential harm during the cleaning process to avoid any accidents or injuries.
Having these tools and materials readily available will make the task of cleaning and maintaining your oil drain pan much more efficient and successful. Remember to always follow safety precautions and choose the appropriate cleaning products for your specific drain pan material.
Step-By-Step Guide To Cleaning An Oil Drain Pan
Master the art of cleaning and maintaining an oil drain pan with this step-by-step guide. Learn foolproof tips and tricks to keep your drain pan in top condition for hassle-free oil changes.
Emptying and Draining the Oil:
- Start by placing a large container under the oil drain pan to catch the oil.
- Carefully remove the oil drain plug or loosen the valve to enable the oil to drain completely.
- Allow the oil to flow into the container until it stops dripping.
Removing Any Residue or Sediment:
- Once the oil has been drained, inspect the oil drain pan for any residue or sediment.
- Use a scraper or a plastic spatula to scrape off any solid particles stuck to the pan.
- Wipe the pan clean with a lint-free cloth or paper towels to remove any remaining residue.
Applying the Degreasing Agent:
- Apply a degreasing agent, such as dish soap, to a brush or sponge.
- Scrub the oil drain pan thoroughly, focusing on any stubborn stains or grease build-up.
- Make sure to cover all surfaces of the pan, including the corners and edges.
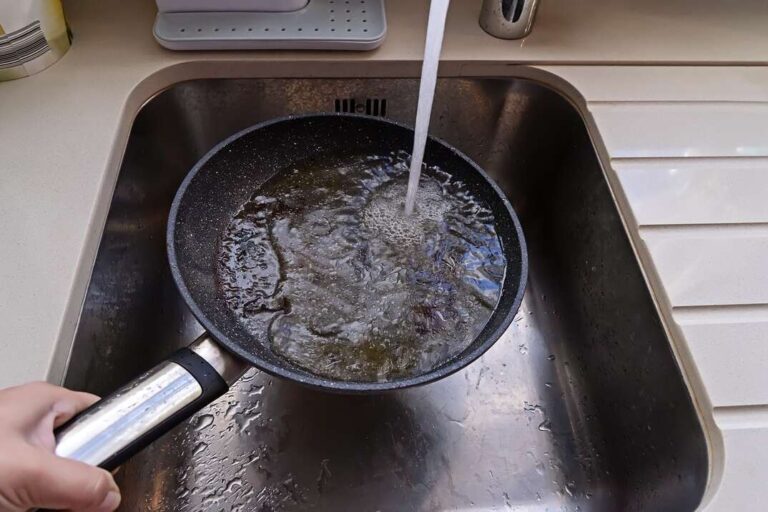
Scrubbing and Rinsing the Pan:
- Rinse the oil drain pan with warm water to remove the degreasing agent and any remaining dirt.
- Use a brush or sponge to scrub the pan while rinsing to ensure all residue is washed away.
- Repeat the rinsing and scrubbing process if necessary until the pan is clean.
Drying and Storing the Pan:
- After rinsing, allow the oil drain pan to air dry completely. If needed, use a towel to wipe away any excess water.
- Once dry, inspect the pan to ensure it is clean and free of any moisture.
- Store the oil drain pan in a clean, dry place, ideally with a lid or cover to prevent dust or debris from settling on it.
Cleaning and maintaining an oil drain pan may seem like a simple task, but it is crucial for the smooth operation and longevity of your vehicle. By following this step-by-step guide, you can ensure that your oil drain pan stays in top condition, ready for your next oil change.
Remember to clean the pan after every use to prevent any buildup of residue or sediment. Regular maintenance will not only extend the life of your oil drain pan but also contribute to a cleaner working environment and more efficient oil changes in the future.
Tips For Maintaining An Oil Drain Pan
Discover foolproof tips for mastering the cleaning and maintenance of your oil drain pan. Keep it in top shape with these expert tips and ensure its longevity and effectiveness. From regular cleaning to proper storage, learn how to maintain your oil drain pan like a pro.
Regular Inspections for Cracks or Leaks:
- Conduct regular inspections of your oil drain pan to check for any cracks or leaks.
- Look out for signs of damage, such as visible cracks, loose fittings, or evidence of oil leakage.
- If you spot any cracks or leaks, it’s crucial to address them promptly to prevent further issues.
Proper Storage to Prevent Damage:
- Store your oil drain pan in a cool, dry place to prevent damage and maintain its quality.
- Avoid exposing the pan to extreme temperatures, which can degrade its material and reduce its lifespan.
- Consider using a protective cover or storing the pan in a dedicated cabinet or shelf to avoid accidental damage.
Replacing O-rings or Gaskets if Necessary:
- Over time, the O-rings or gaskets on your oil drain pan may wear out or become damaged.
- Inspect these components regularly and replace them if you notice any signs of deterioration, such as cracks or leaks.
- You can purchase replacement O-rings or gaskets from automotive supply stores or contact the manufacturer for the specific parts.
Cleaning the Drain Valve Regularly:
- Regularly cleaning the drain valve of your oil drain pan is essential for maintaining its functionality.
- Begin by draining the oil completely from the pan and removing any debris or residue using a rag or paper towels.
- Use a mild detergent or degreaser and warm water to clean the drain valve thoroughly.
- Rinse the valve with clean water and make sure it is completely dry before using the oil drain pan again.
By following these tips for maintaining an oil drain pan, you can ensure its longevity, prevent leaks, and keep it in optimal condition for your next oil change.

Credit: www.gq-magazine.co.uk
How To Prevent Rust And Corrosion
Prevent rust and corrosion by mastering the art of cleaning and maintaining an oil drain pan with these foolproof tips. Keep your oil drain pan in top condition to avoid rust and corrosion, ensuring its longevity and efficient performance.
An essential aspect of mastering the art of cleaning and maintaining an oil drain pan is preventing rust and corrosion. These troublesome foes can compromise the efficiency and lifespan of your oil drain pan. Here are some foolproof tips to keep rust and corrosion at bay:
Properly Cleaning And Drying The Pan
To prevent rust and corrosion, it’s crucial to clean your oil drain pan thoroughly and ensure it is completely dry before storing or using it again. Follow these steps for effective cleaning:
- Use a mild detergent or degreaser mixed with warm water to clean your oil drain pan.
- Scrub the pan gently with a soft-bristle brush or sponge to remove any oil residue or debris.
- Rinse the pan thoroughly with clean water to remove any remaining detergent.
- Wipe the pan dry with a clean, lint-free cloth or allow it to air dry completely.
Applying A Protective Coating
Applying a protective coating can help shield your oil drain pan from rust and corrosion. Consider these options for added protection:
- Apply a thin layer of oil or grease to the inside and outside of the pan, focusing on areas prone to rust and corrosion.
- Use a rust-preventive spray or coating specifically designed for metal surfaces. Follow the manufacturer’s instructions for application.
- For extra protection, consider using a rust inhibitor, which creates a barrier against moisture and corrosive elements. Be sure to read and follow the product guidelines.
Lubricating The Drain Valve
A properly lubricated drain valve not only ensures smooth operation but also helps prevent rust and corrosion. Follow these steps to lubricate the drain valve:
- Before applying any lubricant, ensure the drain valve is clean and free from debris.
- Use a silicone-based lubricant or a specialized lubricant designed for drain valves. Avoid using oil-based lubricants as they can attract dirt and debris.
- Apply a small amount of lubricant to the valve, paying particular attention to the movable parts and seals.
- Move the valve back and forth a few times to distribute the lubricant evenly.
By following these steps and incorporating preventive measures, you can successfully protect your oil drain pan from rust and corrosion. This ensures the longevity and efficiency of your pan, making oil changes a hassle-free experience every time.
Ensuring Proper Functionality Of The Drain Valve
To ensure the proper functionality of the drain valve, mastering the art of cleaning and maintaining an oil drain pan is essential. Follow foolproof tips to keep the drain valve in top condition and ensure efficient operation.
When it comes to cleaning and maintaining an oil drain pan, one of the key areas you need to focus on is the drain valve. This component plays a crucial role in allowing you to easily drain the oil from the pan.
To ensure the proper functionality of the drain valve, follow these foolproof tips:
Regular Lubrication And Tightening
- Lubricate the drain valve regularly: Applying a small amount of lubricant to the drain valve threads can help prevent rust and corrosion, which can make it difficult to open and close the valve. It also ensures smooth operation.
- Tighten the drain valve securely: Over time, the drain valve may become loose due to vibrations or repeated use. To avoid leaks and ensure a proper seal, check the tightness of the drain valve periodically and tighten it if necessary.
Inspecting For Wear Or Damage
- Look out for signs of wear or damage: Regularly inspect the drain valve for any signs of wear, such as corrosion, cracks, or leaks. Addressing these issues early on can save you from potential problems down the line.
- Clean the valve and remove any debris: Use a cloth or brush to clean the drain valve, removing any dirt, grime, or debris that may be obstructing the proper functioning of the valve.
Replacing The Drain Valve If Needed
- Determine if the drain valve needs replacement: If you notice significant wear, damage, or consistent leaks despite tightening, it may be time to replace the drain valve. Don’t compromise on the functionality of the valve, as it plays a critical role in your oil draining process.
- Consider seeking professional assistance: If you are unsure about how to replace the drain valve or lack the necessary tools, it is best to consult a professional mechanic who can help you with the replacement process.
Maintaining the functionality of the drain valve is essential to ensure a hassle-free and efficient oil changing experience. By following these tips, you can avoid any potential issues and keep your oil drain pan in top-notch condition for a long time.
Remember to prioritize regular maintenance and address any wear or damage promptly to maximize the lifespan of your oil drain pan.
Safe Disposal Of Waste Oil
Master the art of cleaning and maintaining an oil drain pan with foolproof tips to ensure the safe disposal of waste oil. Proper maintenance techniques are crucial for efficient oil drain pan cleaning.
Following Local Regulations
- It is essential to be aware of and comply with the local regulations regarding the safe disposal of waste oil. These regulations are put in place to protect the environment and ensure proper handling of hazardous materials.
- Follow these guidelines to ensure you are following local regulations for waste oil disposal:
- Research local regulations: Take the time to familiarize yourself with the specific laws and guidelines regarding waste oil disposal in your area.
- Contact local authorities or waste management facilities: Reach out to the appropriate authorities or facilities to get accurate information on approved disposal methods.
- Attend training or workshops: Consider attending workshops or training sessions that provide guidance on waste oil disposal to stay up to date with the latest regulations.
- Always dispose of waste oil properly: Do not attempt to dispose of waste oil in an improper manner, such as pouring it down the drain or tossing it in the trash. This can have severe consequences for the environment and potentially lead to legal repercussions.
Using A Proper Container For Disposal
- When disposing of waste oil, it is crucial to use a suitable container to prevent leaks, spills, or contamination. Here are some important tips for choosing the right container:
- Use an approved oil drain pan or container: Look for a container specifically designed for waste oil disposal. These containers usually have a secure lid, are made of durable materials, and have the necessary capacity.
- Ensure the container is leak-proof: Confirm that the container you choose is leak-proof to avoid any accidents or potential harm. Check for any cracks, holes, or damage before using it.
- Use a container with the correct capacity: Determine the amount of waste oil you need to dispose of and select a container with sufficient capacity. It is always better to have a slightly larger container than needed to prevent overflow.
- Label the container properly: Clearly label the container as “Waste Oil” to avoid confusion and ensure it is handled appropriately throughout the disposal process.
Recycling Options For Used Oil
- Recycling used oil is an excellent way to reduce waste and promote sustainability. Here are some recycling options to consider:
- Find a local recycling center: Search for nearby recycling centers or facilities that accept used oil. These centers typically have dedicated collection points where you can drop off your waste oil.
- Check with auto parts stores or service stations: Some auto parts stores or service stations accept used oil for recycling. Inquire with them to see if they have a collection program in place.
- Attend community recycling events: Keep an eye on local community events that may include waste oil collection days. These events often provide a convenient way to dispose of your used oil responsibly.
- Utilize municipal hazardous waste collection programs: Many cities have specific programs for the collection and recycling of hazardous waste, including used oil. Contact your local municipality for more information.
Remember, ensuring the proper disposal of waste oil is crucial for environmental preservation and to comply with local regulations. By following the guidelines and recycling options outlined here, you can play your part in keeping our planet clean and safe.
Frequently Asked Questions Of How To Master The Art Of Cleaning & Maintaining An Oil Drain Pan: Foolproof Tips!
How Do You Clean A Used Oil Drain Pan?
To clean a used oil drain pan, follow these steps: 1. Dispose of any leftover oil properly. 2. Rinse the pan with warm, soapy water to remove grease and dirt. 3. Scrub the pan using a non-abrasive sponge or brush. 4.
Rinse thoroughly with clean water. 5. Allow the pan to dry completely before storing or using it again.
What Can I Use To Clean My Oil Drain Plug?
To clean your oil drain plug, you can use a degreaser or brake cleaner.
How Long Should You Let Oil Pan Drain?
The oil pan should be drained for at least 15 minutes to ensure all the oil is removed.
What Is The Best Oil Drain Pan?
The best oil drain pan is one that is durable, leak-proof, and easy to handle.
Conclusion
To wrap up, mastering the art of cleaning and maintaining an oil drain pan is a valuable skill for any DIY enthusiast or professional mechanic. By following these foolproof tips, you can prolong the life and effectiveness of your oil drain pan.
Regularly inspect the pan for any signs of damage or wear, and clean it both before and after each use to remove any built-up residue or contaminants. Opting for a degreaser specifically formulated for oil pans can help make the cleaning process easier and more efficient.
Remember to properly store the pan to prevent any further damage or contamination, and always dispose of any used oil responsibly. With these practices in place, you can ensure your oil drain pan remains in optimal condition, allowing you to tackle oil changes and maintenance tasks with ease.
Happy cleaning!